In United States, the spending for personal data can reach almost $2 BN each year. It is mainly because of the large number of mobile users. Preservation of the information should never be restricted as Apple has made it. Most of the users find it uneasy to use iTunes to delete or reset the iPod. It is a phenomenon that should be put to end at all costs.
The users should be able to ensure that the data which is considered to be as personal is preserved. It is only possible if the techniques other than the ones involving iTunes are explored. In this article the top ways that a user should adopt to get the work done will be discussed in great detail. To format iPod without iTunes this article is worth giving a shot.
Preparation Before You Format iPod touch
Now you begin to format iPod touch. What is the thing that worries you most?
That's right! The existing data kept on your iPod touch. You know that the data may include some hard-to-find songs, private photos, or some precious video clips. You cannot see them gone with the formatting, right?
Just stay relaxed. We have got a easy and reliable tool to help you backup all important data to PC.

Dr.Fone - Backup & Restore(iOS)
Simple and Reliable Tool to Backup Important Data Before You Format iPod touch
- One click to backup the whole iOS device to your computer.
- Allow to preview and restore any item from the backup to a device.
- Export what you want from the backup to your computer.
- No data loss on devices during the restore.
- Selectively backup and restore any data you want.
- Supported iPhone X/8 (Plus)/7 (Plus)/SE/6/6 Plus/6s/6s Plus/5s/5c/5/4/4s that run any iOS versions.
- Fully compatible with Windows 10 or Mac 10.8 to 10.14.
Refer to the following simple backup steps:
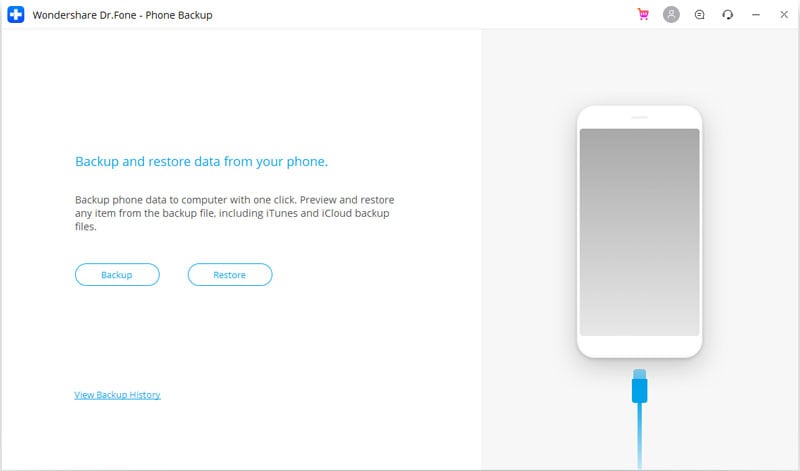
Step 1: Open the Dr.Fone tool on your computer and select the "Backup & Restore" option. Connect your iPod touch to computer by using the lightning cable. The iPod touch device can be detected automatically.

Step 2: This tool supports the backup of most data types. For now, we take the "Device Data Backup & Restore" for example.
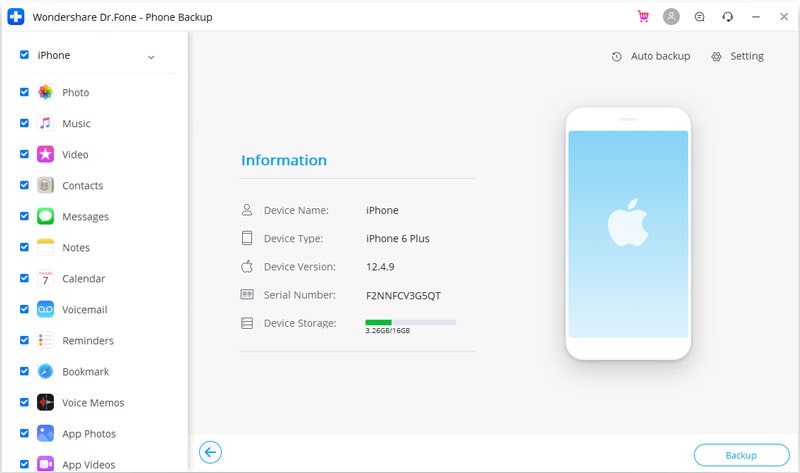
Step 3: In the new screen, the file types will be detected quickly. You need to select your file types for backup. Lastly, click "Backup".
Note: You can also hit on the folder icon in the lower part to select a saving path for the backup files.
Common Solution: Format iPod touch Without iTunes
Let's first get to know the basic way to format iPod touch Without iTunes:- Hold the Home Menu and Sleep buttons at the same time until the iPod restarts and the Apple logo appears.
- If your iPod boots, go into the Settings: General > Reset. There you will find several settings to reset the iPod.
Windows Solution: Format iPod touch Without iTunes
There are millions of windows users all over the world and therefore this OS is popular than ever. One should also consider the fact that resetting the iPod is very much easy using the windows OS. The user should therefore ensure that process that has been mentioned here in relation to the iPod restoration is read in full. The process is so simple that even a layman can carry it out without much hassle and trouble. It is actually a three step process that can be carried out to get the work done. On the other hand, it is also one of the most used processes which require no special hardware or software.
Advantages of using windows for iPod resetting
- The windows OS is used all over the world extensively and therefore troubleshooting the issues is not a big deal at all.
- The user can get the desired results in seconds, because the process is too easy to implement and follow compared to Mac.
- The interface as well as the built in components of the windows ensure that the work is done and in fact they aid it.
- The user can apply the same process if there is a next time without any issue and trouble as it is 100% risk free.
- The results on the other hand are 100% guaranteed. There is not a single case in which the user failed to restore the device.
The steps that are to be followed in this regard are too easy and are explained as well as mentioned below in full.
Step 1: The user needs to attach the iPod to computer and access the My Computer tab. You will see iPod under the Portable Devices tab.

Step 2: The user then needs to right click the device and select the format option to completely wipe the iPod without any issue.

iOS Solution: Format touch Without iTunes
The overall phenomenon of wiping the iPod on another iOS device is though related to stolen devices, but the users can also apply it to restore iPod in general. The iPod restoration on another iOS device has several advantages which could lead the users to apply the process. One of such advantages is that iPod and other iOS devices are strongly compatible due to their creation by the same company, and therefore it is easy for the users to proceed with the process. Though it might sound absurd, but the process can be applied in all scenarios which are not related to theft and steal.
The steps that are involved in wiping the iPod completely has been mentioned as follows to get the work done:
Step 1: The user needs to launch the Lost my iPhone app on the other iOS device. It is not necessary that the iDevice belongs to the user and any one of them can be used delete the data. It is however important that the user login using the same Apple ID and password of the device that is to be deleted.
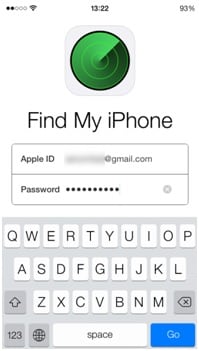
Step 2: The list of iOS devices that are linked to the Apple ID will then be shown on the screen.
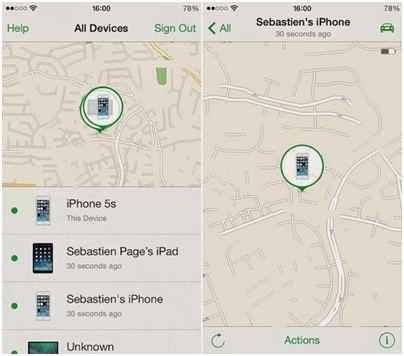
Step 3: The user then needs to press the action button and erase iPhone to proceed in relation to the process.
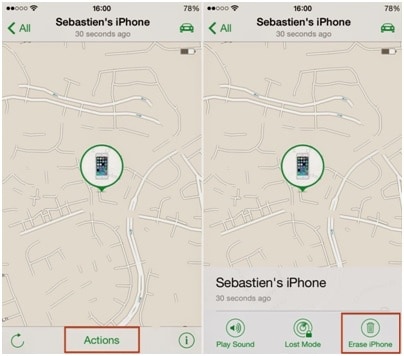
Step 4: The iDevice will then ask for the conformation to proceed further with the process.
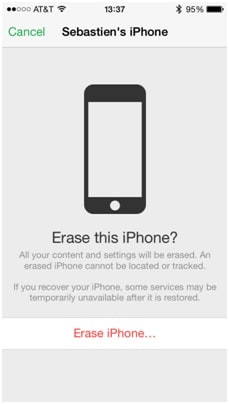
Step 5: Again the Apple ID and password has to be entered to verify the identity.
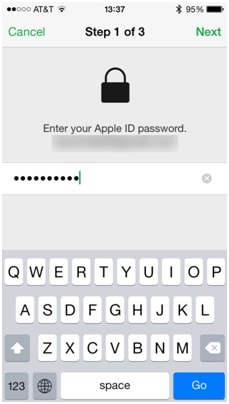
Step 6: The user then needs to add number as well as text message just as a formality to ensure that the wiping process has been completed.
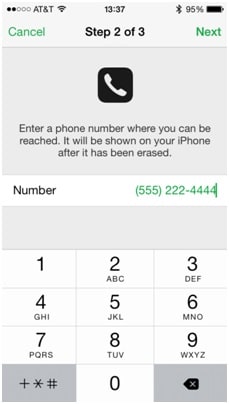
Step 7: The program will prompt that the iPod erase has been started and the user needs to press OK to dismiss the message. The device has been renewed or reset to factory version again:
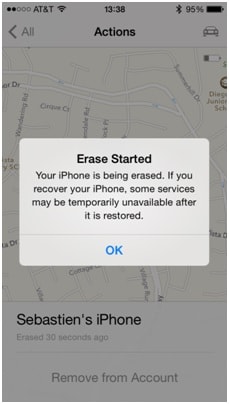
Note: The same process is applied to iPhone to complete the erasing process.
One-Click Solution: Format iPod touch Without iTunes
Found that the above solutions complex? Be worried about the possibility that data may not be erased completely?
Dr.Fone - Data Eraser is just a tool that aims to make formatting iPod touch reliable and easy.

Dr.Fone - Data Eraser
One-Click Solution to Erase iPod touch Data Without iTunes
- Simple, click-through, process.
- Your data is permanently deleted.
- Nobody can ever recover and view your private data.
Here are the instructions by which you can format iPod touch much more easilier:
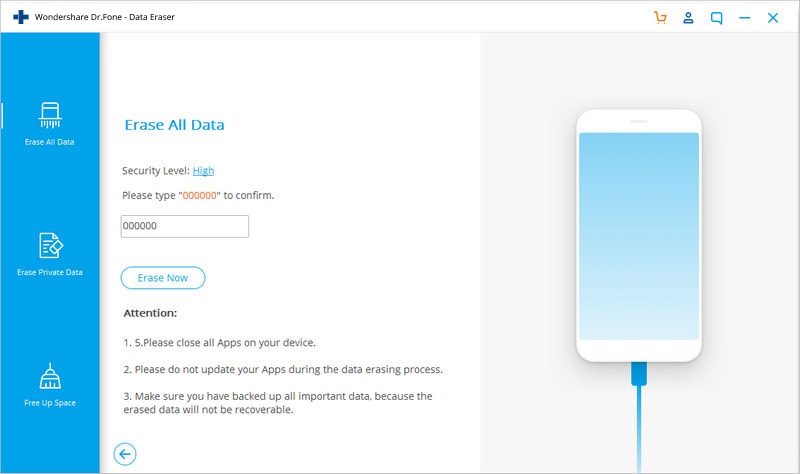
Step 1: Run the Dr.Fone tool on your PC. Among all features listed, select "Erase".

Step 2: Connect your iPod touch to the PC using the cable that comes with the product. When your iPod touch is recognized, Dr.Fone- Erase shows two options: "Erase Full Data" and "Erase Private Data". Select the one that you like.
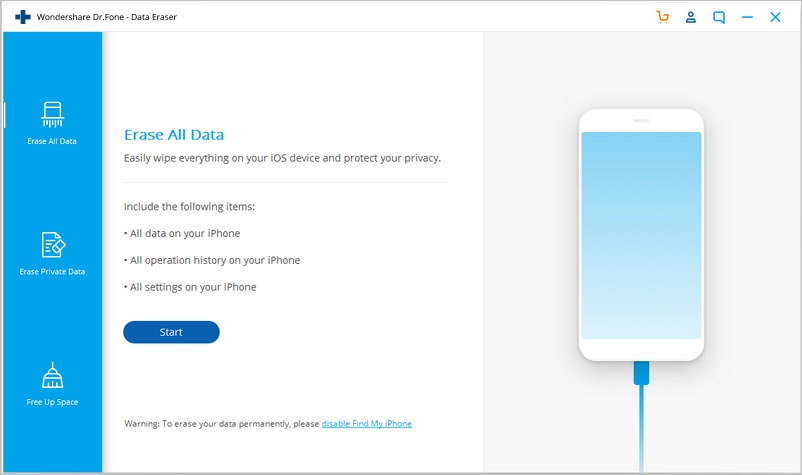
Step 3: In the new window that appears, click on "Erase". This tool thus begins erasing your device data.
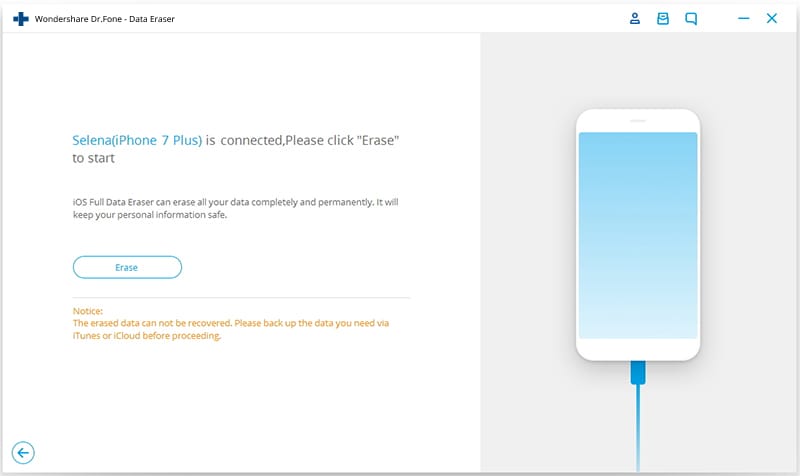
Step 4: Remember that all the erased data will never be recovered by any means. Take care and enter "delete" to confirm your action.
